HOW TO DISASSEMBLE MY X6 AIRLESS SPRAYER
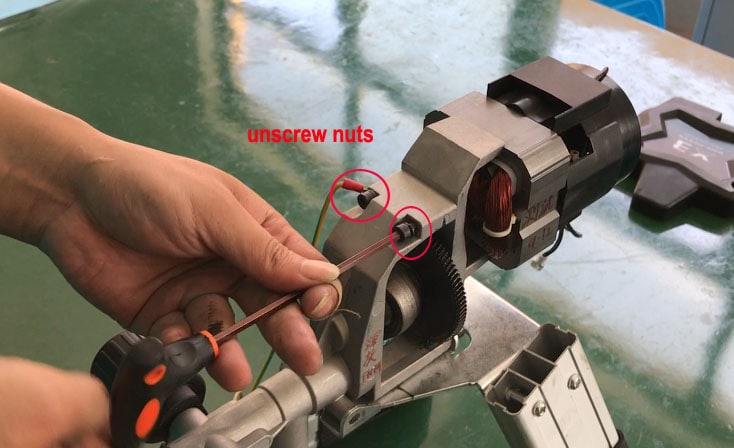
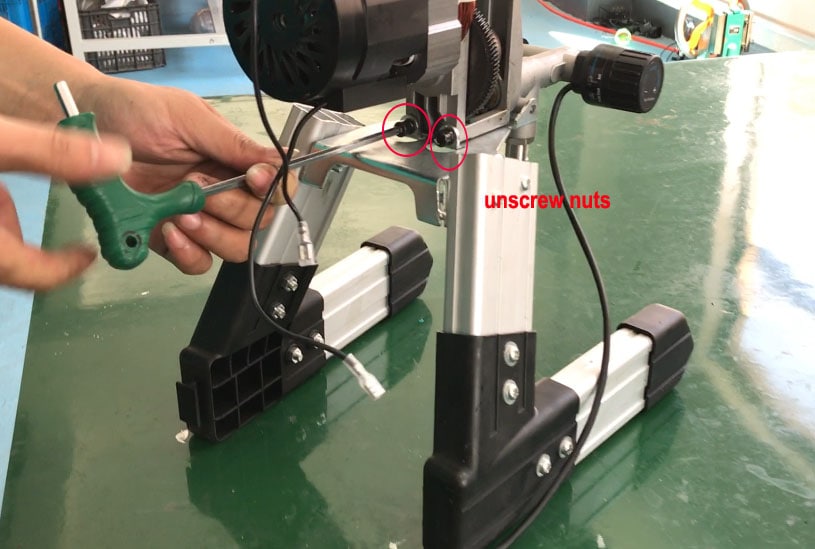
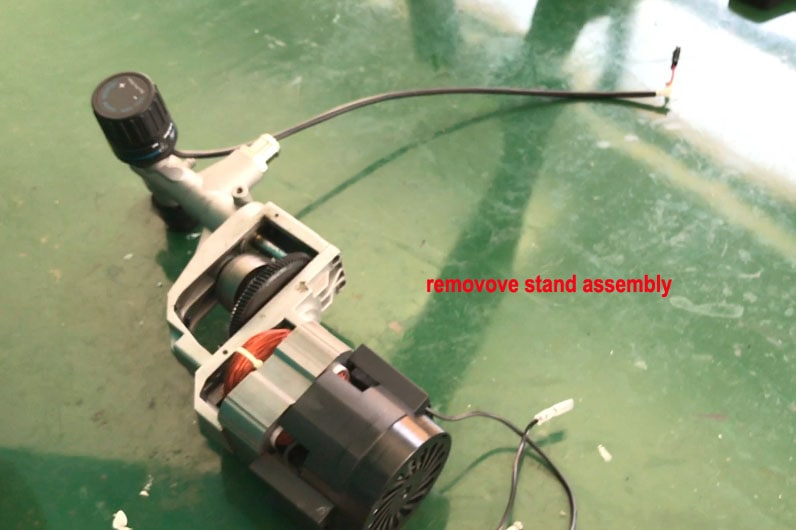
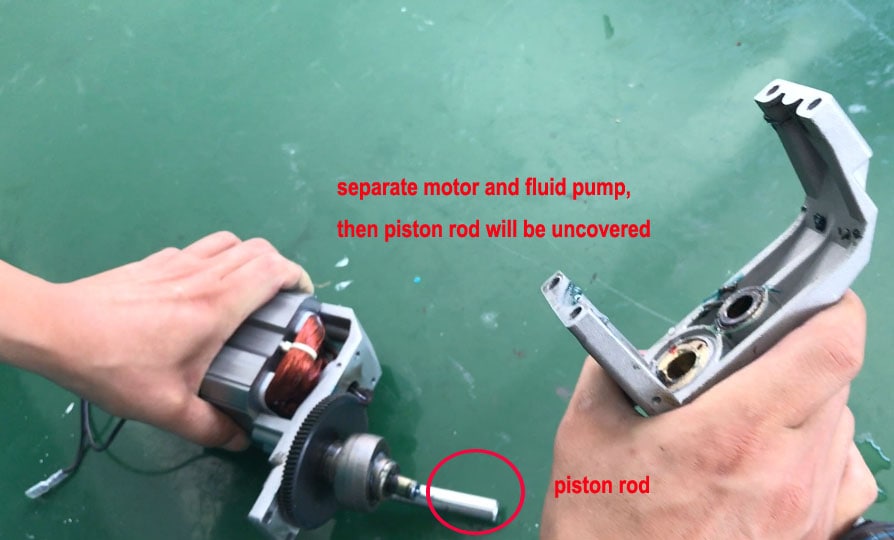
Before disassembling a DP-X6 airless sprayer, confirm that the machine matches the older model shown in this article. The original photos show a particular pump and motor assembly. They must not be used as a universal teardown guide for every product called X6, including later cordless versions.
Decide whether disassembly is necessary
Blocked filters, a sticking inlet or a supply problem can resemble internal pump wear. Complete the relevant external troubleshooting first. Opening the motor housing is not a routine first step for poor spraying, and replacing seals will not fix every pressure problem.
Obtain the correct service information
Use the machine nameplate, voltage, serial number and pump revision to obtain the correct parts drawing. Confirm seal kit, packing orientation, specified tools, tightening requirements and electrical test procedure. The original short photo captions do not supply every torque, wiring detail or service limit.
Make the machine safe
- Remove the coating using the approved cleaning procedure when possible.
- Follow the complete pressure-relief procedure. Do not assume switching off removes trapped pressure.
- Disconnect power and prevent reconnection. Allow hot components to cool.
- Use a clean bench, suitable containers and labelled parts trays. Electrical repairs belong with a competent technician.
Read the original photo sequence in stages
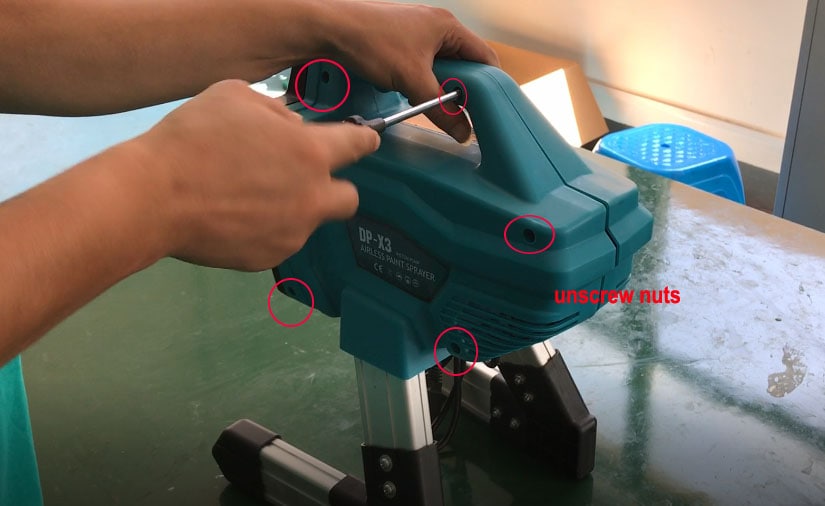
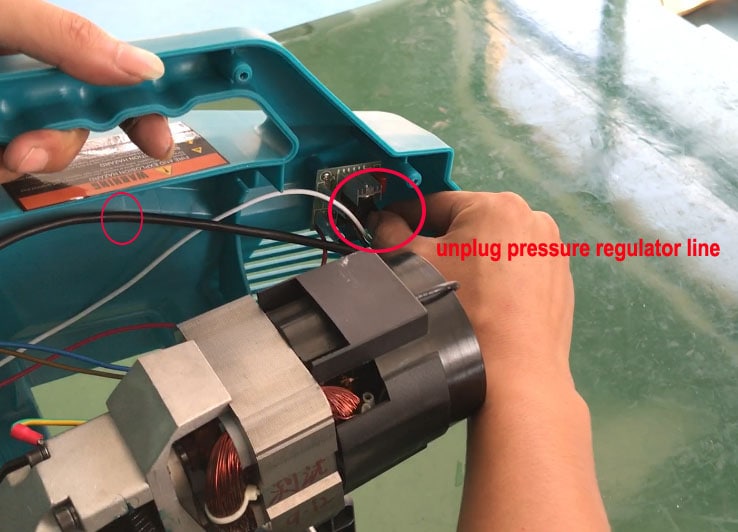
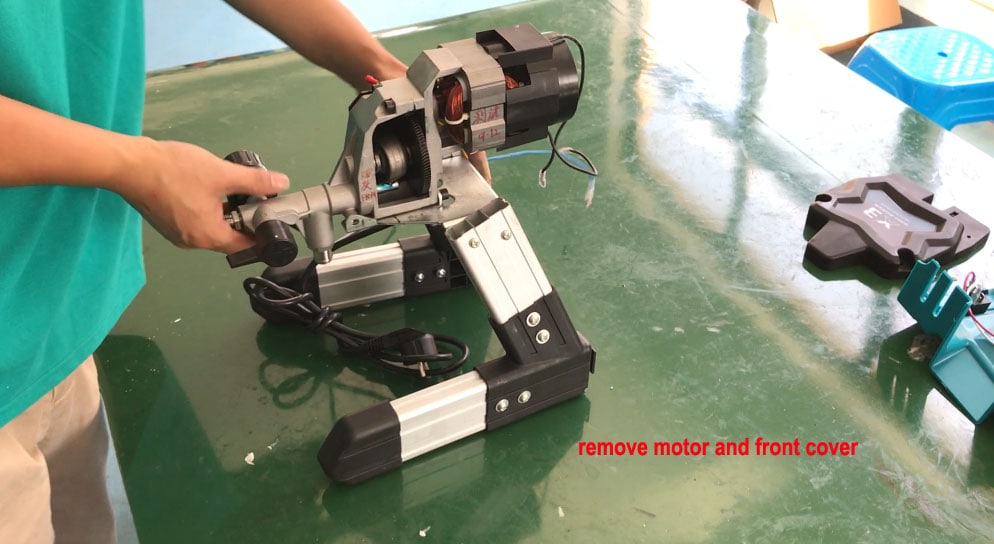
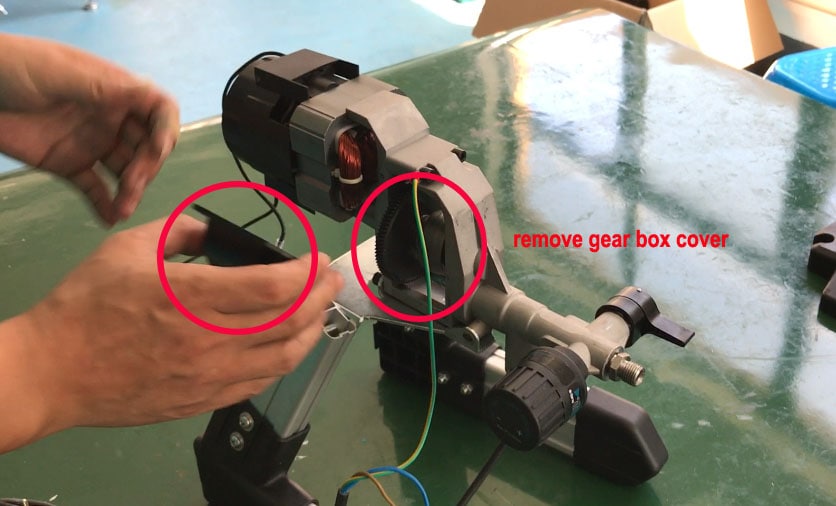
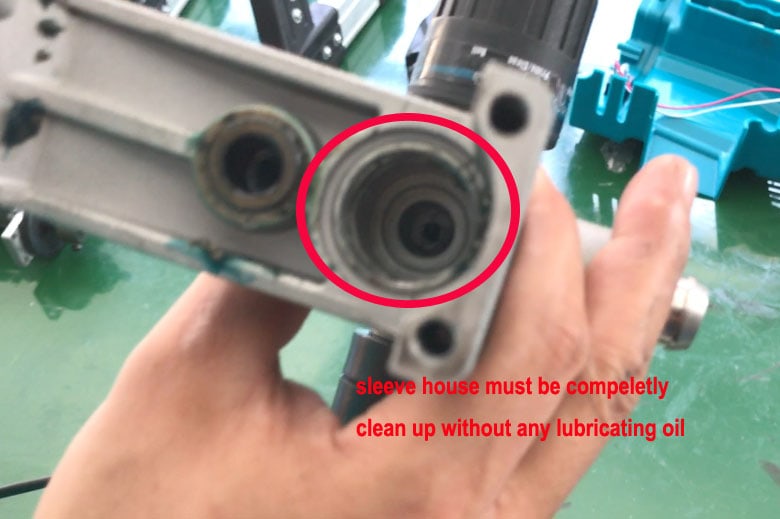
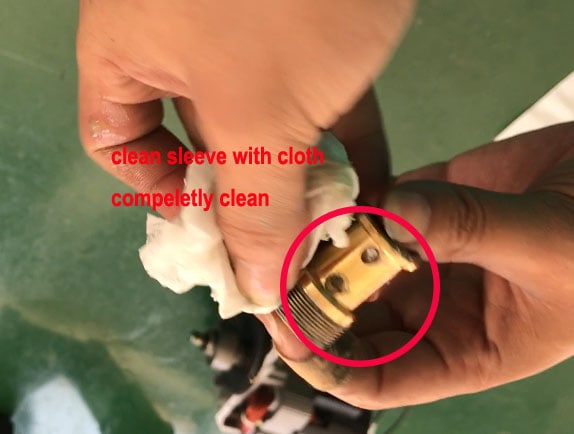
The reference sequence proceeds through front and motor covers, connector identification, gearbox access, separation of the assembly and pump packing inspection. Before disconnecting wires, record routing and connector positions; pull connectors by their bodies rather than the cables. Keep fasteners with the relevant housing.
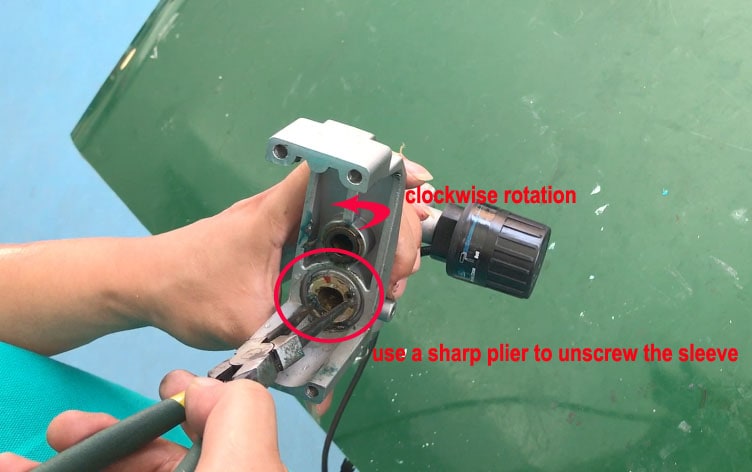
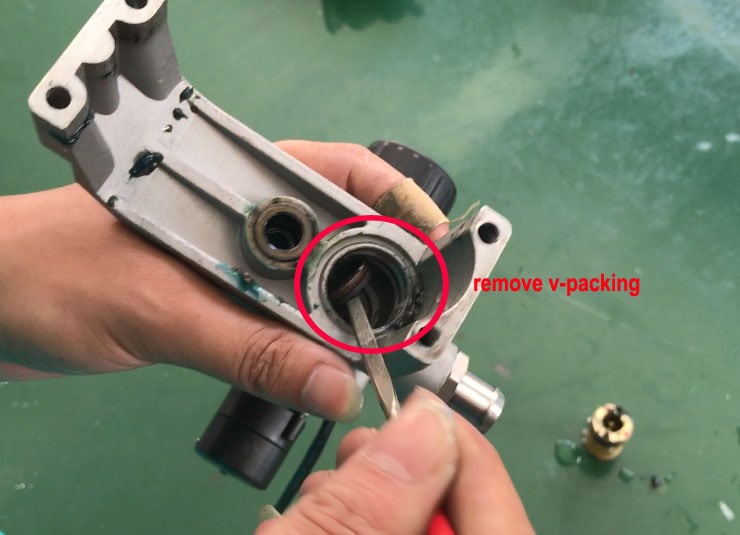
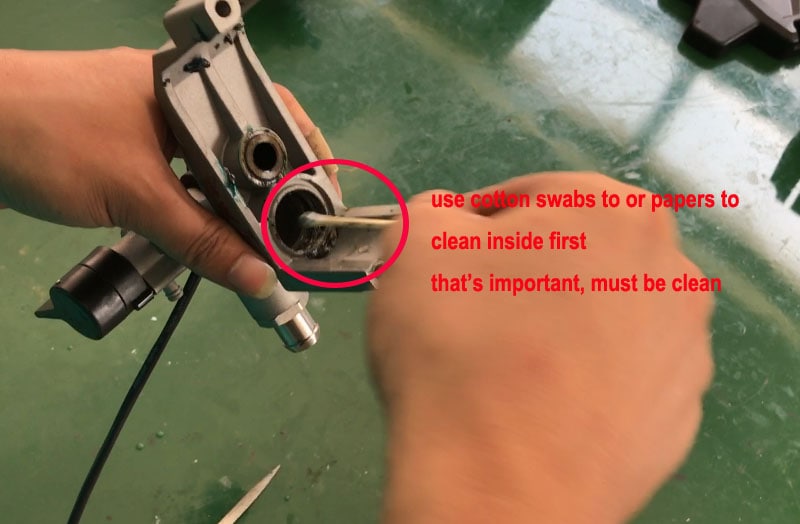
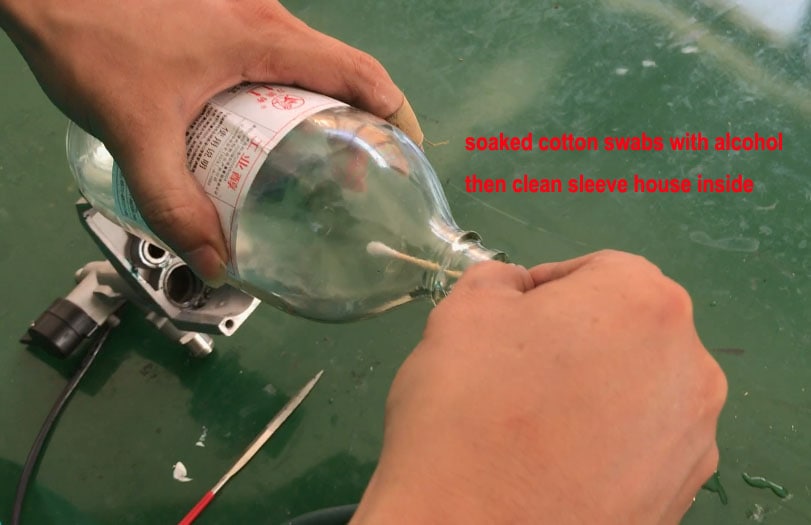
Use the correct holding tools for threaded pump parts. Gripping precision surfaces with pliers can damage them. Inspect the rod, bore, valve seats and packings before deciding which parts need replacement. Do not reinstall damaged seals or assume a cleaning solvent is safe for every component.
Reassemble and test before painting
Follow the actual service instructions for packing direction, lubrication, torque and alignment. Restore guards and all electrical connections, then perform the required electrical safety checks. Conduct a controlled functional test with an approved fluid and inspect for leaks without touching pressurised areas.
Stop if the pump binds, the motor sounds abnormal or a leak appears. Do not repeatedly run the unit to force new packings into place.
Related guides
- How to troubleshoot DP-X3 DP-X6 Airless Paint Sprayer
- Why my paint sprayer starts up but does not draw in paint?
- How to Clean an Airless Sprayer
Original model reference photos
Compare these photos with your machine before using the associated service procedure. They illustrate the earlier assembly and do not authorise live electrical work or pressurised disassembly.