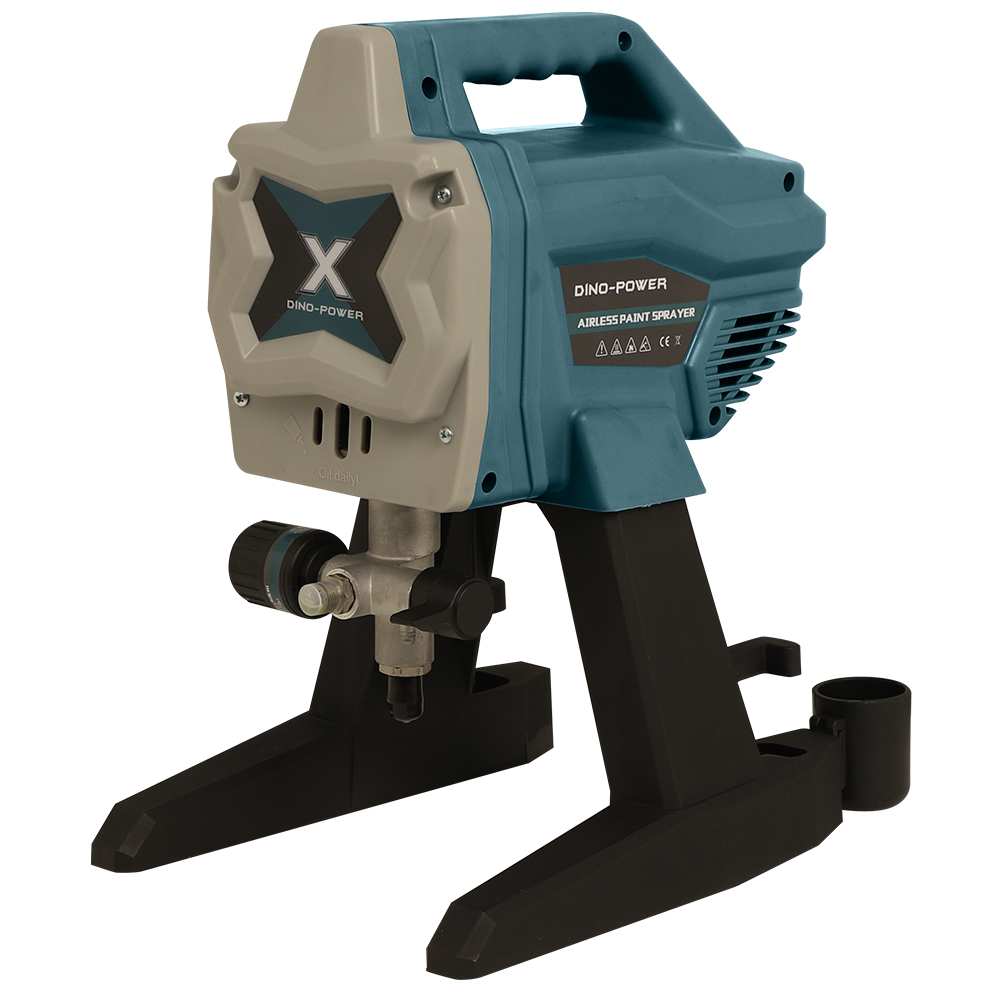
motor-power 700W
flow-rate 1.4L/min(0.37gpm)
max-tip-size 0.019”

Motor power 700W
Flow rate 1.2L/min(0.3gpm)
Max. tip size 0.017”

motor-power 650W for X-6H
max-tip-size 0.019” for X-6H
flow-rate 1.4L/min 0.36gpm for X-6H

motor-power 650W
max-tip-size 0.019"
flow-rate 1.4L/min
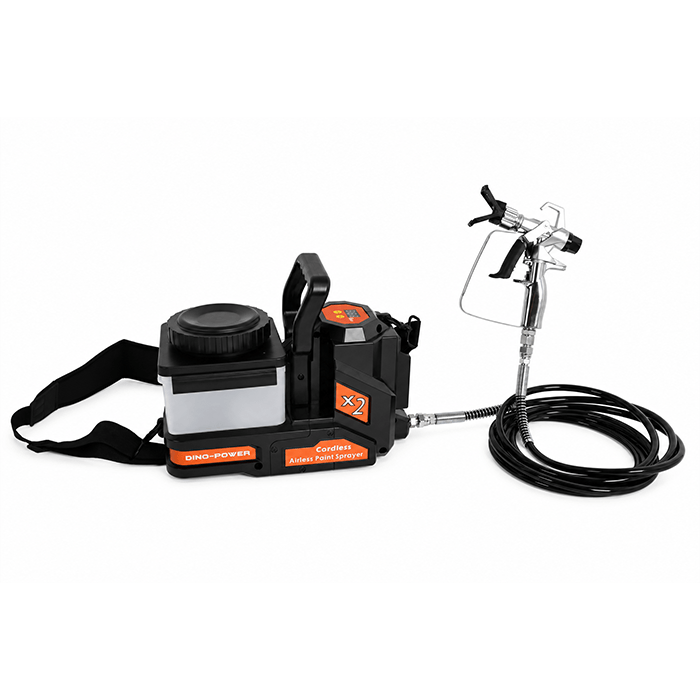
Motor 450W Brushless DC 20V
Flow-rate 1.0L/min
Capacity 2L
Selecting the right DIY airless sprayer doesn’t have to be complicated. Focus on these core features to find the perfect tool for your home painting projects.
Key Points to Consider:
-
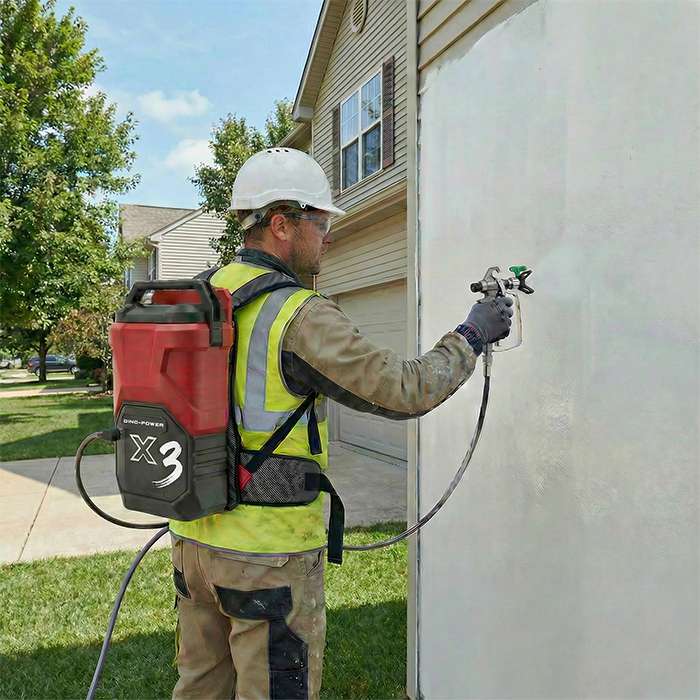
Power Source: Electric vs. Corded. Most of our DIY-friendly airless sprayers such as X6 X9 X10 are plug-in electric models—quiet, ready-to-use, and perfect for interior painting. For ultimate portability far from outlets, consider a battery-powered airless sprayer such as X2, X3, X10D, X20D.
-
Motor Power & PSI (Pressure). Check the maximum PSI rating. For typical DIY paint projects (fences, decks, interior walls, roofing), a unit with 2,000 – 3,000 PSI is sufficient. Higher PSI handles thicker coatings more easily.
-
Flow Rate (GPM). This determines how fast it sprays paint. A 0.20 – 0.30 Gallons Per Minute (GPM) range is ideal for DIY users, balancing speed and control without being overwhelming.
-
Hose Length & Quality. A 25-foot spray hose is a great standard, allowing you to move around without constantly moving the unit. Look for a flexible, durable hose resistant to kinks. if you think 7.5m is short, you could change to 10m, 12m or even 15 meters.
-
Spray Tip Selection & Size. The spray tip determines the fan pattern width and material flow. A kit with multiple reversible tips (like .013″, .015″, .017″) is versatile for different paints and projects. The tip size must match your material.
-
Portability & Weight. Since you’ll be moving it, check the unit’s weight. Compact airless sprayers with a sturdy carry handle or wheeled cart are best for DIY homeowners.
Unlock professional-quality results and save countless hours with a DIY paint sprayer. Whether you’re a weekend warrior tackling a renovation or a homeowner refreshing your space, these versatile tools excel in numerous applications. Here are the top projects where a DIY-friendly paint sprayer truly shines:
1. Interior & Exterior Walls
Achieve a smooth, even finish on large, flat surfaces faster than any roller. Perfect for painting entire rooms, accent walls, or refreshing your home’s exterior siding without brush marks.
2. Fences, Decks & Outdoor Structures
Power through rough, textured surfaces efficiently. A sprayer effortlessly coats wooden fences, deck railings, gazebos, and sheds, providing uniform coverage that protects against the elements.
3. Furniture & Cabinetry Makeovers
Revitalize kitchen cabinets, dressers, tables, and chairs with a flawless, factory-like finish. Sprayers excel at covering intricate details and hard-to-reach areas on furniture painting projects.
4. Doors, Windows & Trim
Get a sleek, professional coat on interior/exterior doors, window frames, and baseboard trim. The precision control avoids drips and delivers a smooth result on these high-visibility areas.
5. Garage & Basement Floors
Apply epoxy floor coatings or durable concrete paints quickly and evenly. A sprayer ensures consistent coverage for a tough, long-lasting surface that withstands heavy traffic.
6. Large Furniture & Built-Ins
Tackle bulky items like bookshelves, entertainment centers, and bed frames with ease. Spraying is far faster and more uniform than brushing, especially on large, flat panels.
7. Outdoor Furniture & Patio Sets
Quickly refresh metal patio chairs, wicker sets, and wooden benches. A sprayer makes short work of coating the many surfaces and crevices, ensuring complete protection.
8. Pergolas, Lattice & Detailed Woodwork
Reach into intricate patterns and tight spaces that brushes and rollers can’t. This is ideal for garden structures, porch details, and decorative trim.
9. Home Exterior Updates
Beyond siding, use your sprayer for shutters, gutters, downspouts, and foundation coatings to give your home’s curb appeal a cohesive, polished update.
10. Craft & Custom Projects
From repainting bicycles and metal gates to creating custom finishes on signage or headboards, a sprayer offers creative flexibility for unique DIY paint projects.
The advantages of an Airless Paint Sprayer over traditional painting tools (like paint roller or brush)
-
Unmatched Speed & Efficiency: Airless paint sprayers provide rapid painting and high-speed coverage, completing projects up to 4 times faster than brushes or rollers, dramatically improving painting productivity.
-
Superior, Professional Finish: Delivers a smooth, even coat without brush marks or roller stipples, ensuring a flawless professional paint finish on all surfaces.
-
Exceptional Coverage on Rough Textures: Perfectly coats rough surfaces, exterior siding, and textured walls by atomizing paint into a fine mist that penetrates every crevice.
-
Material Versatility: Handles a wide range of coatings including thick latex, stains, primers, and varnishes without thinning, maximizing painting tool versatility.
-
Significant Labor & Time Savings: Reduces physical fatigue and saves painting time on large-scale projects like home exteriors, deck staining, and fence painting, offering major DIY painting benefits.
-
Reduced Manpower for Large Areas: Ideal for commercial painting projects and large surface painting, allowing one operator to achieve what would typically require a full crew.
-
Precision & Control: Modern airless spray tips and adjustable pressure settings offer excellent spray painting control for detailed work and crisp lines when masked.
-
Enhanced Material Transfer Efficiency: Minimizes paint waste and overspray compared to some conventional sprayers, leading to cost-effective painting and better paint adhesion.
-
Ease of Use on Challenging Surfaces: Simplifies painting hard-to-reach areas, ceilings, latticework, and paint spraying for furniture with extended hoses and lightweight guns.
-
Long-Term Project Durability: The high-pressure application forces paint into the substrate, creating a more durable, longer-lasting coating that is resistant to peeling and wear—key for exterior paint durability.


We DP have big range of DIY paint sprayers, from 1st to 3rd generation, X6 X9 X10
and we have the high cart version / Hopper version for each model.
and meanwhile, except the corded sprayer, we have X2 X3 battery powered airless sprayer also.
A DIY airless paint sprayer can spray suitable latex or emulsion paint when the coating requirements are within the specific model’s capabilities. Thinning is not always necessary, but not every paint can be sprayed unthinned by every DIY sprayer.
- Read the paint data sheet: Check whether airless application is recommended and note the required tip size and any permitted dilution.
- Check the model limits: The recommended tip must not exceed the sprayer’s maximum tip rating. Thick coatings may require a different sprayer rather than extra thinner.
- Prepare the paint: Mix thoroughly and strain out dried particles before filling the hopper or placing the suction tube in the paint container.
- Test before painting: Adjust the pressure according to the manual and check the spray pattern on a sample surface. If thinning is permitted, use only the specified thinner and dilution limit.
Do not assume that epoxy, textured or solvent-based coatings are suitable for every DIY model. With 20 years of experience in the spraying industry and 10 years of manufacturing experience, DINO-POWER can help you match your paint data sheet and project requirements to a suitable DIY airless sprayer. Contact our team before purchase if you are unsure about coating compatibility.
Reduce overspray by masking the work area, matching the spray fan to the surface and using the lowest pressure that produces an even, fully atomized pattern. Airless spraying still creates paint mist, so pressure adjustment does not replace proper protection of nearby surfaces.
- Mask before spraying: Cover floors, windows, furniture and adjacent surfaces. Move nearby vehicles and other exposed items out of the spray area.
- Control the pressure: Start with the manual’s recommended setup and adjust on a test surface. Excessive pressure creates more mist; too little pressure can leave heavy edges in the pattern.
- Keep the gun square: Maintain a consistent distance and keep the gun perpendicular to the surface instead of swinging it in an arc.
- Watch outdoor conditions: Stop when wind carries paint beyond the protected area. Use shielding where appropriate and follow the coating’s application conditions.
Provide ventilation and wear the protective equipment specified by the coating safety data sheet and sprayer manual. Never rely on a claim of zero overspray.
Streaks and runs have different causes. Heavy lines at the edges of a spray fan can indicate poor atomization, while drips or runs usually mean too much paint has been applied in one area. Check the spray pattern and your technique before changing settings.
- For fan-edge streaks: Check that the tip is suitable for the coating and within the sprayer’s rating. Inspect for a worn tip or restricted filter, and adjust pressure only within the manual’s limits.
- For uneven coverage: Keep the gun perpendicular to the surface, maintain a steady speed and distance, and overlap each pass by approximately 50%.
- For runs: Avoid pausing with the trigger pulled. Start moving before triggering and release the trigger before stopping. Follow the paint manufacturer’s wet-film thickness and recoat instructions.
- Practice first: Test on cardboard or a spare panel before spraying the finished surface.
Follow the pressure-relief procedure before inspecting the tip, filter or hose. Never use your hand to check for a blockage or leak.
Clean a DIY airless paint sprayer after each use, before paint dries inside the pump, hose or gun. Use a cleaning fluid approved for both the coating and the sprayer, then follow the model’s storage instructions.
- Relieve pressure: Follow the complete pressure-relief procedure in the manual before removing the tip, guard, filters or other pressurized parts.
- Remove remaining paint: Empty the hopper or remove the suction tube from the paint container as directed in the manual.
- Flush the fluid path: Water is commonly used for water-based paints; other coatings may require a specified cleaner. Confirm fluid compatibility and follow the manual’s flushing procedure.
- Clean removable parts: Clean the tip, guard, filters and suction strainer as applicable. Keep liquid away from the motor and electrical components.
- Prepare for storage: Use the recommended pump-preservation fluid if required. Store the machine without pressure in a dry, frost-free location.
Do not leave paint in the machine overnight or assume that leaving water in the pump is suitable for long-term storage. Refer to the exact model’s manual for shutdown and preservation requirements.